Showing posts with label Holiday. Show all posts

Monday, August 4, 2014

Toostie Roll & Bit-O-Honey Fudge aka "Obama Fudge"

Nothing says I love you like homemade sweet treats, except maybe a diamond ring, and a new pair of shoes. So when my super amazing and supportive cousin was feeling down, I knew it was time to fire up the burners for some good old fashion love in a pot. I don't like chocolate myself, but these were not for me and I know that my sugar toothed relative would appreciate the sacrifice involved in whipping up these fudge bites ( I don't even like the smell of chocolate really). I have lovingly nicknamed these bars my Obama Bars, they remind me of Michelle and Barack side by side looking like the sweetest bits of  classic Americana.


Happy Birthday Mr. President!


Heres What You Need:


Toostie Roll Layer of Fudge:
  • 24 tootsie Roll Midgees
  • 1 tablespoon butter
  • 1 1/2 Tablespoon Peanut Butter
  • 1 1/4 tablespoon Milk
  • 1 3/4 Cup Confectioners sugar (store bought or make your own*)


Bit - O- Honey Layer of Fudge:
  • 24 Bit-O-Honey Small Bites
  • 1 1/2 tablespoon butter
  • 1 1/2 Tablespoon Peanut Butter
  • 2 tablespoon Milk
  • 1 3/4 Cup Confectioners sugar 
  • Sliced Almonds ( Optional)

Here's What You Gotta Do:

  1. Cover and 8 inch x 8 inch baking dish in Aluminum Foil, lightly oil the pan and set aside.
  2. In a heavy bottom pot melt together the tootise rolls, butter, peanut butter and milk over a low heat. Stir mixture constantly to avoid burning the fudge before the ingredients melt.
  3. When the the candy mixture is melted and smooth, ( about 5 minutes) slowly add the sugar in 1/2 at a time. Stir well until all of the sugar is melted and the fudge mixture is smooth
  4. Spread the Tootsie roll fudge in the prepared dish, this is your bottom layer. Set pan aside.
  5. In the same clean pot or another heavy bottomed pot melt togehter the Bits-O-Honey, butter, peanut butter and milk over a low heat. Stir mixture constantly to avoid burning the fudge before the ingredients melt. The Bit-O- Honey will take about 5 minutes more than the tootsie rolls, be patient its so worth the added trouble.
  6. When the the candy mixture is melted and smooth, slowly add the sugar in 1/2 at a time. Stir well until all of the sugar is melted and the fudge mixture is smooth.
  7. Spread the Bit-O-Honey  fudge in the prepared dish, this is your top layer.
  8. Press the sliced almonds into the fudge and let the fudge cool.
  9. Once cool, take the foil out of the pan and cut the fudge into what ever shape you choose.
  10. If you will not be serving immediately, make sure to store the fudge in a airtight container.


Classic Candies


* After mixing in the homemade powdered sugar. 

Find out how to make powdered sugar in a pinch in the post called "Confectioner's Sugar in a Pinch- DIY Your Own"


The first layer of Tootsie Roll fudge spread out in the baking pan. 


Showing the second layer of "Bit-O-Honey" Fudge smoothed out and topped with sliced almonds.


The sweet brown layers reminded me of Mr. and Mrs. President, 
side by side, making the world a better place. 
The nuts, well you can't be a politician without dealing with a few nuts. 


Okay so I did pinch off pieces of the Bits-O-Honey layer. 
Don't judge me it looked so good!


Care packaged and ready to go!


Life is Delicious...Go Taste It!


Wednesday, July 23, 2014

Whirlwinds and Other Blessings

Okay so  its been a long while since I wrote a post. I can assure you it has not been because life has not been absolutely chock full of deliciousness. In fact I think its been so chock full I've been busy eating it up. A lot has happened so let me fill you in.

On May 9th I found out that I passed the Arizona bar. Wohoooo! All that hard work and forfeiture of fun was not in vain. Then, as is the next logical step, I decided to start my own law firm. Yep, Keo'vonne Wilson Legal, PLLC is officially a thing now. I hosted a launch party which just so happened to coincide with my birthday. Yep, I had a birthday and threw myself a party. It was wonderful!  I also built a website, created business cards and marketing merchandise ( magnets, t-shirts, social media accounts). I am so proud of my little start up.

I also got a very awesome video from my sister and bro-in-law back home. KJ, my nephew, is crawling! I am so excited. It has been an amazing journey watching him grow up. I am so thankful for social media and technology because I don't have to miss a moment.


With a new business, interesting clients, networking, blogging for the firm, cooking, attempting to push the limits of professional wear, it has been the most delightful whirlwind!


Below is a photographic peek at all of the delicious-ness
The order of events is a little hazy but it's all great.


                                                This is how I celebrated passing the bar.


Well I passed the Bar here, so I figured it was time I finally became a licensed Arizona Driver. 


Here is the hummus I made for road trip to Cali Number 1.


Rice Noodles with kale, bell peppers and mock beef. 
Gosh I hope I wrote down this recipe somewhere.


Granola I made for Road Trip To Cali Number 2. 


This was a photo used on my birthday/website launch invite.
Pretty snazzy huh!


Days before my birthday my sister's birthday gift to me came in the mail. 
A rice cooker! This woman knows me too well. 
My old one crapped out months ago. 


Rice cooker's maiden voyage, Spicy rice and beans. 


Birthday bling for birthday/launch party. 


The business cards arrived just in time for the birthday bash. 


The party favors were gourmet cupcakes in these cute takeout boxes. I pulled out the shoe-string looking ties and replaced it with ribbon that coordinated with the business card style magnets. 


I enjoyed this blue cheese stuffed olives in my dirty gin martini. Of course I hosted my birthday/launch at Hanny's. I love this place, this martini...


...and these people. 


This was one of the only time I enjoyed yogurt. I really dont like it unless it's mixed in something. Summer ripened peaches, a light dusting of ground ginger, agave and toasted oats and almonds. 
This was a perfect breakfast.


I FINALLY made my sister's super simple eggplant parmesan. 
I will share this recipe soon. 


Homemade almond pesto. 
I have since killed the basil plant, but the legend of the pesto live on.


Heading to the gym wearing one of the t-shirts I designed featuring my firm's moto

"Turn Your Dream Into Your Legacy"

Shield your eyes from the dirty mirror.


This is what Bono looks like with his summer do. I didn't realize how smal this dog really was. 
He still believes he is half great dane, half Beyonce. 


Went to Vegas for the 4th of July watch my "little" cousin, Leena Star, open for Doug E. Fresh. 
She is a little fire cracker on the stage and off. 


Us being silly and posing for a fan picture in front of the poster she is on. 
We had a blast at the afterparty!


Rang in the 4th of July celebrations at a Pho place in Treasure Island. 


Yum!


Taking shelter from the heat of the Las Vegas Stip in on of the many casinos. 


Riding on the highway with the top down seemed like a good idea...


It was not!


Selfie after dinner in the Ling Ling Lounge on the third level (of five) at Hakkasan. 
Hakkasan is allegedly the hottest restaurant in Vegas. 
The food was exceptional, but it was so dark that the guy at the next table lent me his phone with a flashlight app to read the menu. 


At this point in the night, the only thing I was fighting was sleep. It was a great end to my Vegas trip!


I've begun tutoring this cutie twice a week in preparation for kindergarten. 
My cousin's son keeps me laughing the entire time.


After finally cleaning out my car, I made this handy organizer to keep things in reach but out of the way. 
Instructions coming soon.


My World cup outfit. Go 'Murica!
Picked up that tie for a dollar.


This is the local pub at 10am on a tuesday during a USA World Cup match. 
I kept wondering, where do these people work?


Mom's birthday gift arriving the standard month later. 
After my last phone bit the dust, mom made it clear that I had no more excuses. 


Bono finding comfort in sweaty gym bags. 


Life is Delicious...Go Taste It!


Monday, March 17, 2014

Warm Brussel Sprout Salad with Maple Balsamic Dressing

Happy St. Patrick's Day. I decided to make this warm smokey dish in honor of the holiday. Brussel Sprouts aren't particularly Irish, but they are green. I mean I'm not particularly Irish either, but I did spend an afternoon in an airport in Ireland...close enough. Sláinte


Here's What You Need: 


  • 1/2 sliced yellow onion
  • 1/4 cup balsamin vinegar
  • 2 tablespoons maple syrup
  •  2 good dashes of liquid smoke
  • 2 1/2 cups sliced brussel spouts
  • 1/8 teaspoon salt 
  • 1/8 teaspoon cayenne pepper (optional)


Here's What You Gotta Do: 


  1. Heat a very lightly oiled non-stick pot with a lid, over a low heat. 
  2. Add onions to the pot and heat until onions are soft and brown ( about 5 minutes). 
  3. Add balsamic vinegar, maple syrup, and liquid smoke to the pot and let the sauce reduce over a low heat for about 10 minutes.
  4. Toss in the brussel sprouts, cayenne and salt. Turn off the heat and stir well to coat the brussel sprouts with dressing. Put the lid on the pot and let the salad soften and stem for 5 minutes. 
  5. Serve Warm and Enjoy!


Serves 2 as a salad and 4 as a small side dish.


Brussels sprouts contain sulforaphane
a chemical believed to have potent anticancer properties


 Brussels sprouts are an excellent source of vitamin C; 100 g ( 3.50 oz) 
For comparison's sake, 100 grams of orange juice yields 83% of your RDA.  


Getting Sauced. 


Bowl of Green Goodness


Showering myself in the Luck. 


Life is Delicious...Go Taste It!


Thursday, February 13, 2014

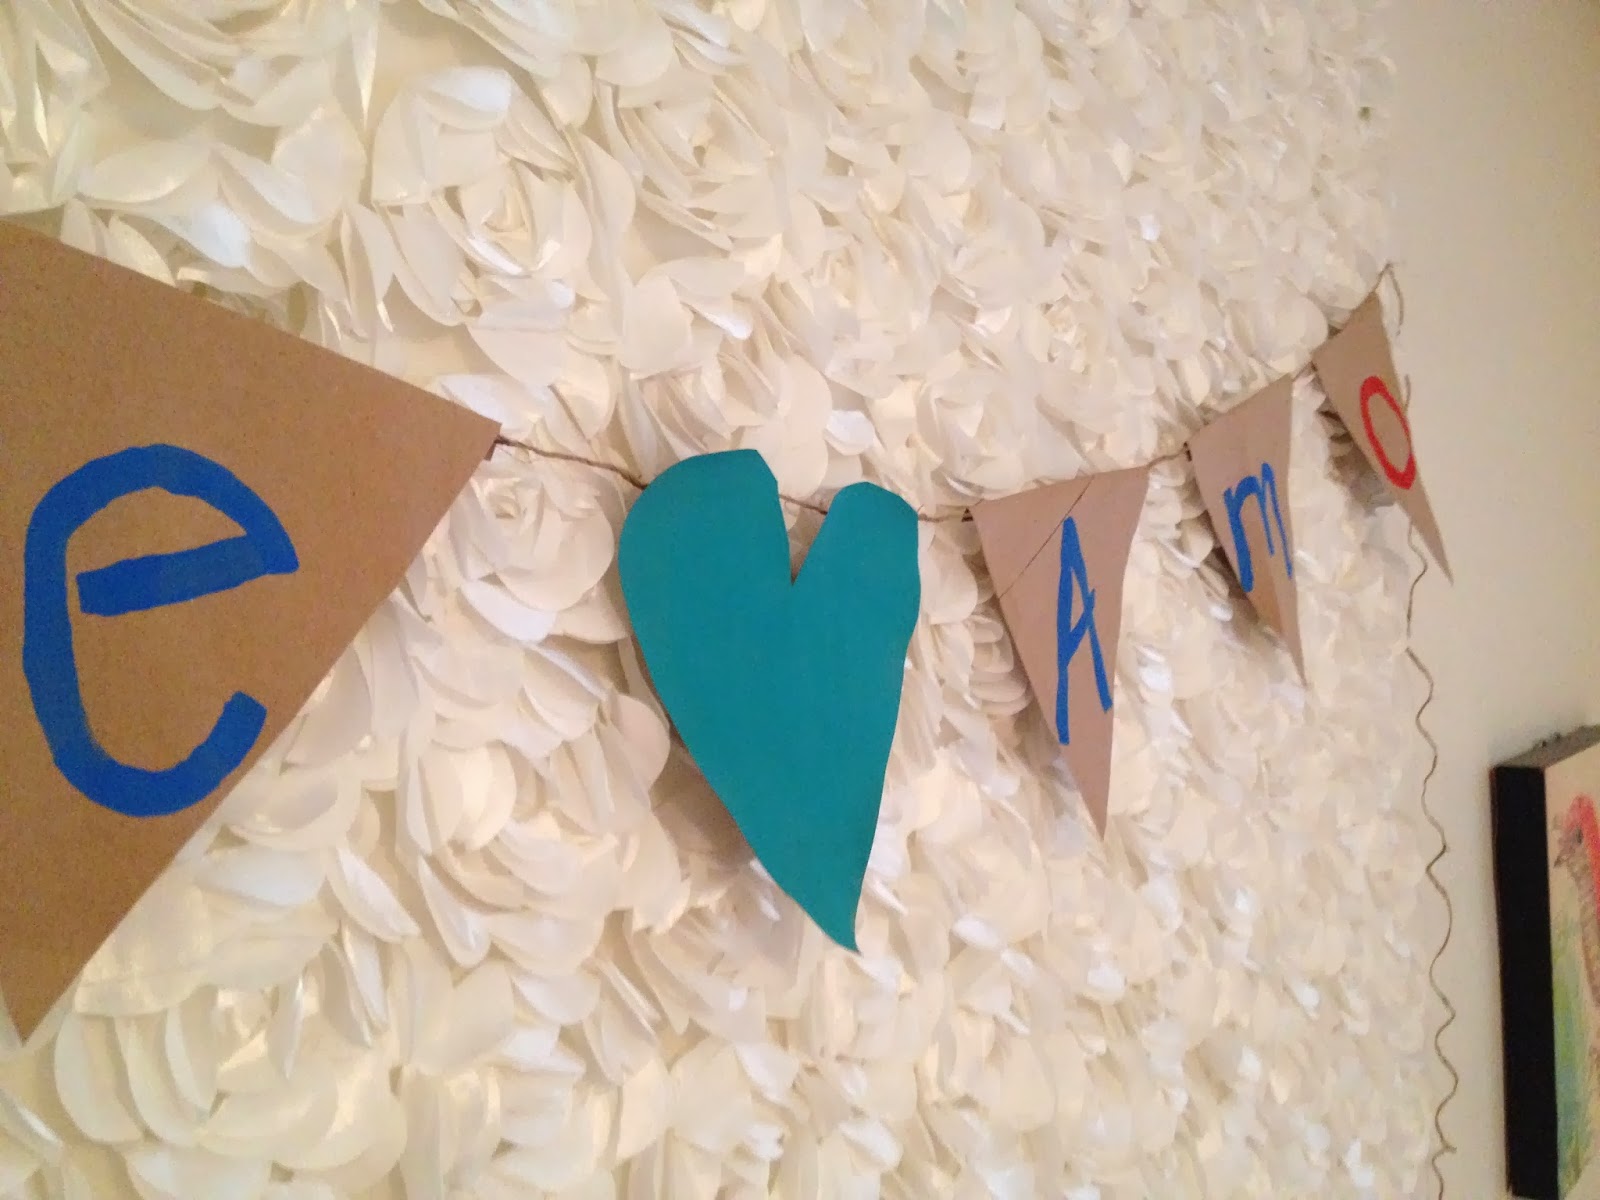
Decorative Bunting From Brown Paper Shopping Bags

I needed a creative moment in-between studying Corporations law and Commercial Paper. I came across these pretty images of bunting while Pinning. The use of triangles keep the bunting looking modern, while the use of burlap, jute and a natural color scheme adds a touch of rustic charm.


So Pretty


Handmade Custom Bunting from Etsy


It was very easy to be inspired, however I did not have any burlap, nor $40 for a custom bunting. But I did have brown paper shopping bags from my last visit to Trader Joe's and everything else in my "Bag-O- Craftiness". My custom Valentine's Day bunting cost me exactly $0 to make. I think I'm in love with this project. 


Here's What You Need:

  • Brown Paper Bags ( I used three bags to make both of bunting banners below)
  • Scissors
  • Clear Tape
  • Acrylic Craft Paint
  • Jute Twine or Ribbon
  • Pencil


Here's What you gotta Do:

1) Cut the bags in half down the sides. Trim off side paper until you only have two large flat sheets of brown paper from each bag.


2) USe a pencil and measuring tape to mark and measure triangles that are roughly 8" on the broad side. These does not have to be perfect and I think looks better if it isn't.


3)  Cut out triangle shapes. I cut one triangle per letter in the word I wanted to spell out. (This is not a hard rule, if you want to put a whole word sentence, phrase or shape in one triangle, do it) Here is where you would cut out any other shapes as well. 


3) Paint the letters or designs you want on each triangle. Get Creative!


4) Once the paint dries turn your letters over and fold over 1/4 inch of the top of your triangles. 


5) Place the jute twine under the fold and tape into place. Leave about 1" inch in-between each triangle, and keep taping until you have finished attaching all of your triangles. 


6) Hang using tape or tacks.


7) Sit back and admire your handy work. Yeah, you did that!


Just lovely above the bed


You are loved!


Life Is Delicious...Go Taste It!