Thursday, March 13, 2014

Abstract St. Patricks Day Nails

I celebrated my first St. Patricks Day as an adult in South Korea four years ago.  I wore green, drank my first "Irish Car Bomb" and spent the evening enjoying whiskey and darts with my fellow expats. I've celebrated the holiday ever year since. Last year, in New Orleans, we celebrated with the locals for three days straight. I have a feeling that the folks in New Orleans have extended celebrations for every holiday, but that's just a guess. This year, I'm getting a jump on some work so that I can revel in the celebration without guilt, hence the homicide chart in the back ground. I like to call this manicure "Luck of the Irish"... or if I try it again after the holiday "M is for Murder". 


For the soft gold color I used from Moonstone from Urban Outfitters and  the vivd green is Jungle Me from H&M and a clear topcoat. 


I painted 2 coats of the gold color. 
When it was completely dry, I used masking tape to create the V shape and painted the exposed area with green. 
When the green was dry to the touch, I applied the top coat. 


Life Is Delicious... Go Taste It!

Monday, March 10, 2014

It's Always a Good Time to Turban

Turban wearing is not for the faint of heart, but gosh they are a fabulous fashion accessory. Turbans have been around for thousands of years. Traditionally worn by men to signify a religious sect or social status, turbans began to show up on western trendsetters in the 70's. Turbans are a great "Anytime" accessory. They can be paired with a casual tunic and jeans in the spring, big sunglasses and a swimsuit in the summer, fall coats and boots, and faux fur in the winter; you simply cant go wrong with a turban. This timeless piece really adds a big impact to any outfit and hides dye jobs gone awry, impeccably!


I embellished this $2 turban with a vintage earring.
 I lost the other one a long tome ago, but couldn't bear to throw this one away. 
When hoarding goes right!


Turban in warm weather...


Just as stylish in colder weather!
Road Runner Pin sent as a graduation gift form my Aunt Karen. 


Turban and Treats!


Life is Delicious ...Go Taste It!


Thursday, March 6, 2014

DIY: Tassel Necklace

I survived the Arizona Bar. I won't get my score  until May so the next few months will be spent looking on the bright side. It was grueling marathon toward this moment and now its over. I have so much free time and I have quite a few ideas on what to do with it. First project: make some use out of my graduation cords. Up until today, they hung in my coat closet full of promise but virtually useless. That was until I stumbled across this gem on Anthropologies's website.


$89 Originally $328


Then there was this golden bauble on the Bergdorf Goodman Website. 


Photo: Rachel Zoe Long Tassel-End Necklace$292 Originally $650


I really like the bohemian vibe of the cord and tassel look but I couldn't help but wonder if there was a cheaper better way to get that aesthetic. Cue graduation cords! They could finally be dusted off and repurposed. You could easily do this project with curtain tie backs. They are available at any local home-wares store that sales window treatments. I found some on ebay for less than $5 apiece.
Mine cost me $0 dollars if you don't count the $100K+ spent on law school in order to get my honors cords. But that is neither here nor there. 

You'll need one cord with tassels and about 2 minutes of your time. 


Here's what you gotta do: 


1. First drape the cord on your neck with the tassels hang in the back.


2. Then bring the tassles across your back to the front of you. so you will have one full look around your neck with the tassels hanging in the front. Make sure the tassels are hanging evenly. 


3. Start by tucking the tasseled end of the cord into the front loop and wrap the tasseled end around


4. Rock out with your cord out!


For this one I left the tassels uneven. 
Got this one for Negotiating the heck out of some legal conflicts. 
No big deal!


 These bad boys came from serving on the SBA. 
I draped these haphazardly and loved the statement necklace quality I was left with. 
And yes this represents the chaos of any student board association!


Life is Delicious... Go Taste It!

Thursday, February 13, 2014

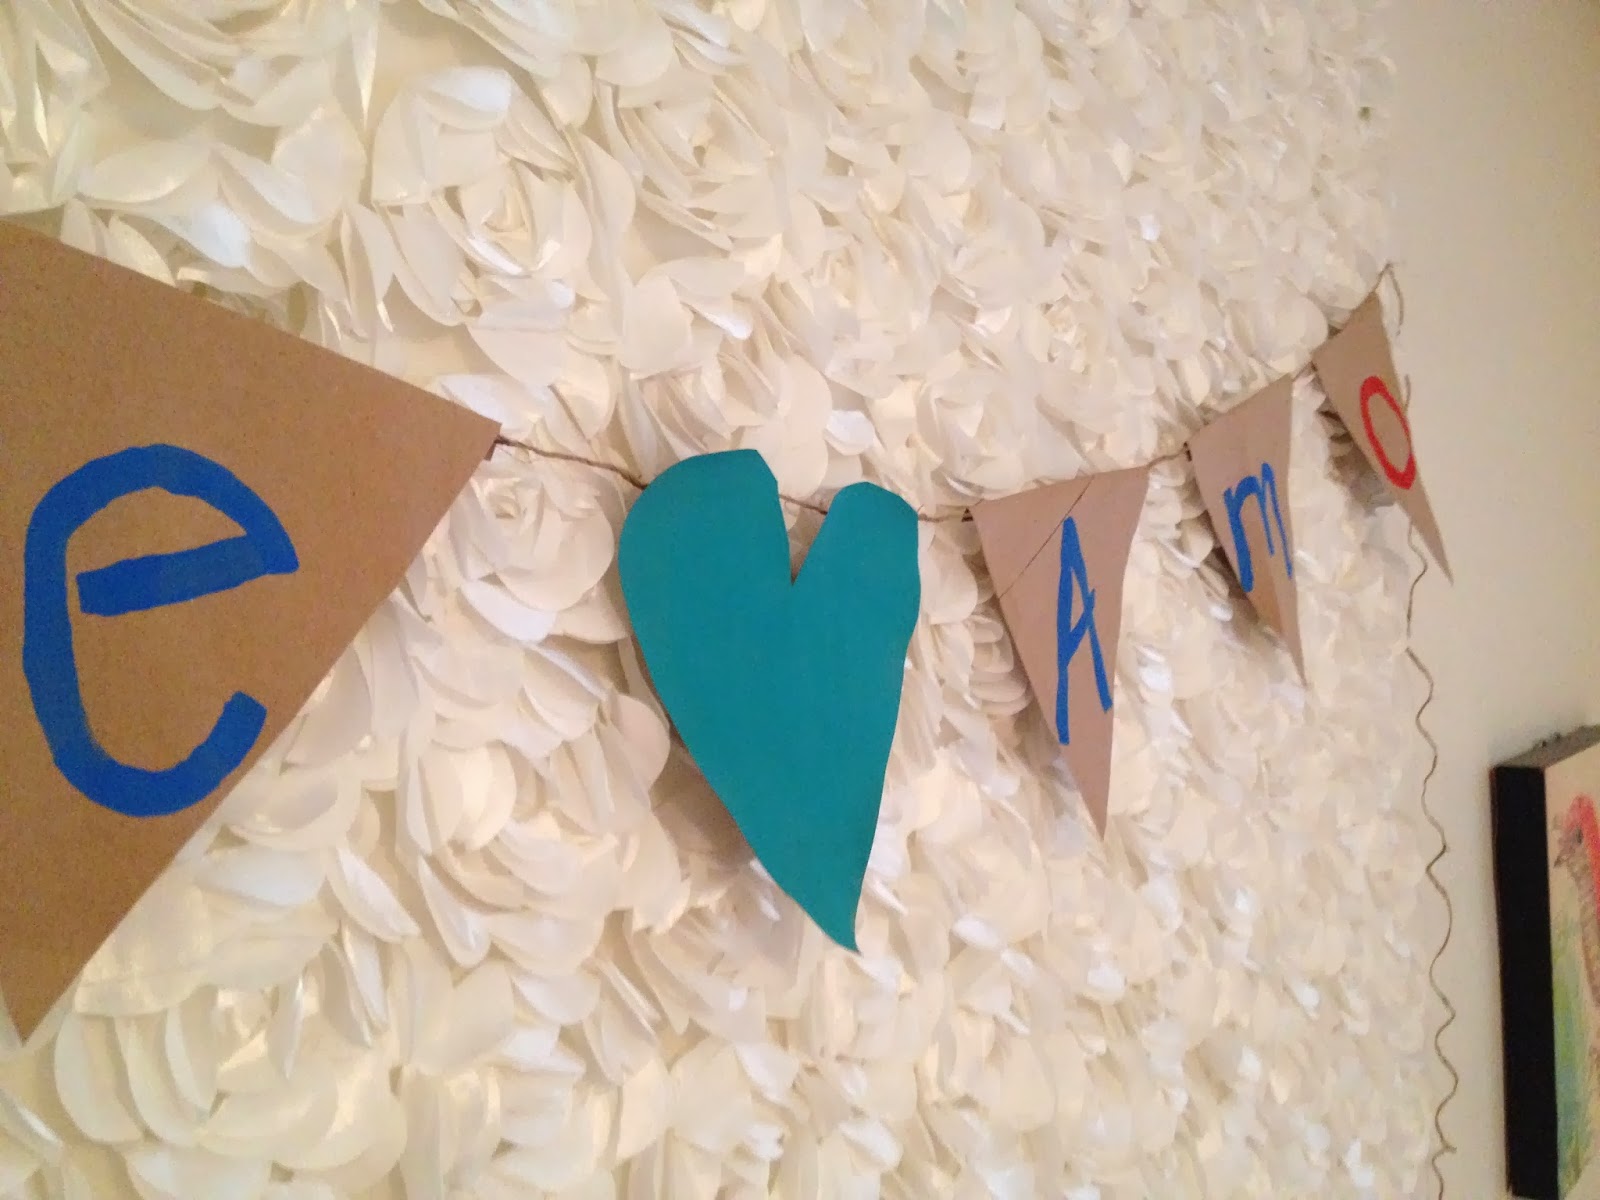
Decorative Bunting From Brown Paper Shopping Bags

I needed a creative moment in-between studying Corporations law and Commercial Paper. I came across these pretty images of bunting while Pinning. The use of triangles keep the bunting looking modern, while the use of burlap, jute and a natural color scheme adds a touch of rustic charm.


So Pretty


Handmade Custom Bunting from Etsy


It was very easy to be inspired, however I did not have any burlap, nor $40 for a custom bunting. But I did have brown paper shopping bags from my last visit to Trader Joe's and everything else in my "Bag-O- Craftiness". My custom Valentine's Day bunting cost me exactly $0 to make. I think I'm in love with this project. 


Here's What You Need:

  • Brown Paper Bags ( I used three bags to make both of bunting banners below)
  • Scissors
  • Clear Tape
  • Acrylic Craft Paint
  • Jute Twine or Ribbon
  • Pencil


Here's What you gotta Do:

1) Cut the bags in half down the sides. Trim off side paper until you only have two large flat sheets of brown paper from each bag.


2) USe a pencil and measuring tape to mark and measure triangles that are roughly 8" on the broad side. These does not have to be perfect and I think looks better if it isn't.


3)  Cut out triangle shapes. I cut one triangle per letter in the word I wanted to spell out. (This is not a hard rule, if you want to put a whole word sentence, phrase or shape in one triangle, do it) Here is where you would cut out any other shapes as well. 


3) Paint the letters or designs you want on each triangle. Get Creative!


4) Once the paint dries turn your letters over and fold over 1/4 inch of the top of your triangles. 


5) Place the jute twine under the fold and tape into place. Leave about 1" inch in-between each triangle, and keep taping until you have finished attaching all of your triangles. 


6) Hang using tape or tacks.


7) Sit back and admire your handy work. Yeah, you did that!


Just lovely above the bed


You are loved!


Life Is Delicious...Go Taste It!

Wednesday, February 12, 2014

White Chocolate Dipped Pretzel Rods


My family is  2,347 miles away for most holidays, but they are always right here when I need them. We make use of pretty much every form of social media and phone service to keep each other in "the loop". When the miles stretch out during the holidays I love to send them hugs via the U.S. Post. For Valentines Day I decided something sweet and homemade would be perfect. These white chocolate covered pretzel rods wouldn't completely derail everyone's New Years resolutions for healthier snack choices, but believe me, I ate enough of the reject rods to know that these chocolate covered hugs satisfy the most intense sweet tooth. Colorful "glitter" sugar and almonds add a touch of whimsy that is perfect for gift giving and party treats. 


Here's What you Need: 


Here's What you gotta Do:


  1. In a double boiler, bring a cup of water to a gentle simmer in the bottom pot. 
  2. In the top part of the double boiler, add the chocolate chips.  
  3. When the chocolate begins to melt, stir in  the vegetable shortening. Stir until the chocolate is mostly melted and remove from heat. 
  4. Continue to stir until all of the chocolate is melted and has a smooth consistency throughout. 
  5. Lay out parchment paper or any smooth surface to place your dipped rods on to dry without sticking. 
  6. Use a spoon to cover about 3/4 of the rod in white chocolate. 
  7. Sprinkle the rods with "glitter" or almonds.
  8. Place the covered rods on the parchment paper to dry. 
  9. The chocolate will be dry and easily handled in about  7 to 10 minutes. 

* Store extra in a ziplock or airtight jar. 


I found it easier to work with 5 rods at a time


Let the chocolate dry completely before handing the rods. 


Yum!


The "glitter" really made the rods sparkle. 


They were as good as they looked. 


The almond covered rods were for my sister and her husband who are cutting back on their empty calories.  Just ignore the whole "white chocolate" thing. 


Photo from my mom when the treats arrived.
 They loved them!
I packaged the rods in cute plastic bags with ribbon, 
and those bags where put inside of an airtight Ziplock. 
Everything was dutifully padded and boxed. 
I shipped the Valentines Day Package express to ensure everything arrived fresh. 


“I think careful cooking is love, don’t you?

The loveliest thing you can cook for someone
who’s close to you is about as nice a valentine as you can give.”
– Julia Child


Life is Delicious...Go Taste It!


Colored Sugar "Glitter"

I usually refuse to work with glitter. Period.  It spreads everywhere, gets into everything, and its impossible to get rid of. It is the herpes of the craft world. But I really wanted to make my White Chocolate Dipped Pretzel Rods special for Valentine's day. I found this recipes all over Pinterest, but everyone complained that the sugar melts. Well, I just turned the heat down and viola...a fun way to add some bling bling to your sweets.


Here's What You Need:


  • 1/4 cup Sugar ( white or light works best)
  • Food coloring of your choice
  • A glass jar with a lid ( optional)


Here's What You Gotta Do:

  1. Preheat oven to 300 degrees
  2. Pour sugar into a jar that has a lid.
  3. Add drop by drop the desired food color. 
  4. Put the lid on the jar and shake the sugar in between drops until you reach your desired color intensity.
  5. Spread the sugar out over a 8x8 baking pan and bake at 300 degrees for 10 minutes.
  6. When sugar is dried, pull the pan out of the oven and let your "glitter" cool for 5 minutes.
  7. Pour and store in a airtight container for later use


I didn't have white sugar but the natural light sugar worked just fine


    • For the pink color, I used two drops of red food coloring
    • For the teal color, I used 4 drops of blue and 2 drops of green food coloring


I tried mixing it in a bowl at first, but the jar was the best way to get the color evenly distributed through the sugar. 


Sparkly Goodness that you can wash away.


Blinged Out Pretzel Rods!


Thursday, February 6, 2014

Grey and Stripes Valentine's Day Mani

Since my freshman year of college, Valentine's Day has proven to be a complete disaster. And I mean "sobbing into a purple body pillow, eating day old popcorn, listening to Sade" kinda disasters. With that being said, somehow I manage to still always look forward to the holiday. I've started a tradition-of-sorts where I buy myself a bouquet of flowers and chill a bottle of bubbly, so no matter what the day brings, I've shown myself some love. One of these days I'll figure out the formula to the making the Valentine's Day in my head match the Valentine's Day I end up with. In the mean time, I did figure out this cute non-traditional manicure to celebrate the day.


The base grey color is NYC's In A NewYork Minute nail polish in "Side Walkers"
The "White", "Intense Pink" and "Black" are Art Deco Nail Art lacquers


It ain't perfect... but neither is Love!


Life is Delicious...Go Taste It!